DSLR in a Proton Beam
2021
After putting a webcam in front of a proton beam, I figured someone had to have put a DSLR in front of one and published this results. Well, I couldn't find any examples of this online after extensive searching, so I decided to put my own camera in front of a 200 MeV proton beam.
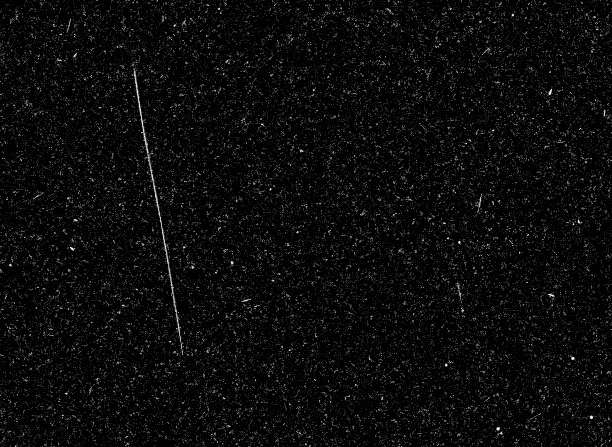
Image From Unshielded Nikon D3200 in a 1e7 200 MeV p+/cm^2 Proton Beam
Setup and Processing
To control the camera, I used a 100' USB expension cable and a piece of software called "DIY Photobits.com Camera Control 5.0". This software allows the exposure settings to be adjusted and the shutter triggered remotely. It also transfers the photos back to the test laptop over USB so the results can be viewed in real time. Since I didn't want to break this camera, I only exposed it to direct beam for a couple low flux calibration runs. Most of the shots are from the camera behind some kind of shielding which is still interesting because it shows how secondary particles like neutrons are generated by shielding as a resulr of spallation.
In all of these shots, the camera is actually behind other test articles. Since the test articles in question were circcuit boars with thin aluminum hoursings, the energy of the protons reaching the shielding directly in front of the camera is is still in the ~190 MeV range. The more energy a proton has, the less energy lost per unit length as it passes through matter. This means that you can generally stack quite a few targets in the beam and still have high proton energies at the rear targets. To illustrate this, I used TRIM to simulate the average energy of transmitted ions through 1cm of Aluminum starting at 200MeV and entering the average energy of the transmitted ions in the previous run as the starting energy of the ions in the next run. I repeated this process until the protons were fully stopped:
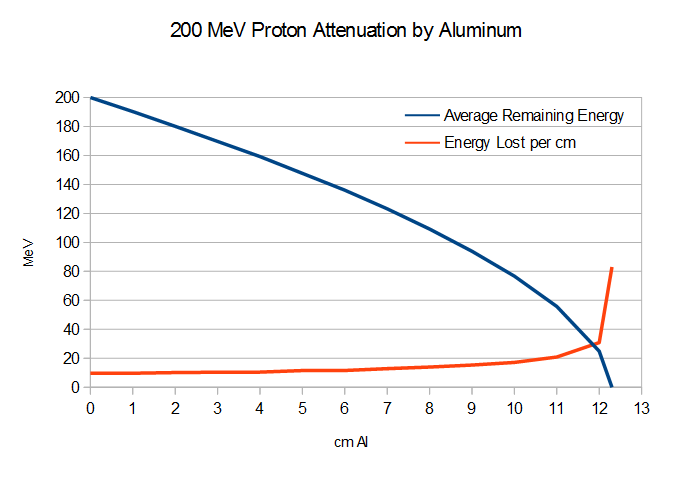
Air also does not appreciably attenuate protons in this kind of setup — 2.5m of dry nitrogen reduces energy by ~1.25 MeV and it takes 235m of N2 to fully stop 200MeV protons.
I recorded all of the shots in the beam as RAW files so that I could demosaic them as monochromatic images. A 20 MP camera has 20,000,000 photo sites, but those are spread between red, green, and blue pixels in a repeating block pattern of one red, one blue, and two green pixels. In order to provide the most resolution, the color and luminance of each pixel in the final image is interpolated from the values of the surrounding pixels. This can cause some interesting effects when you are putting energy into the sensor with ionizing radiation instead of light — if a row of red and green pixels is lit up by an event, a demosaicing algorithm will assume that that there is actually red light present in adjacent pixels as well that it just can't see because the adjacent rows only have blue and green pixels.
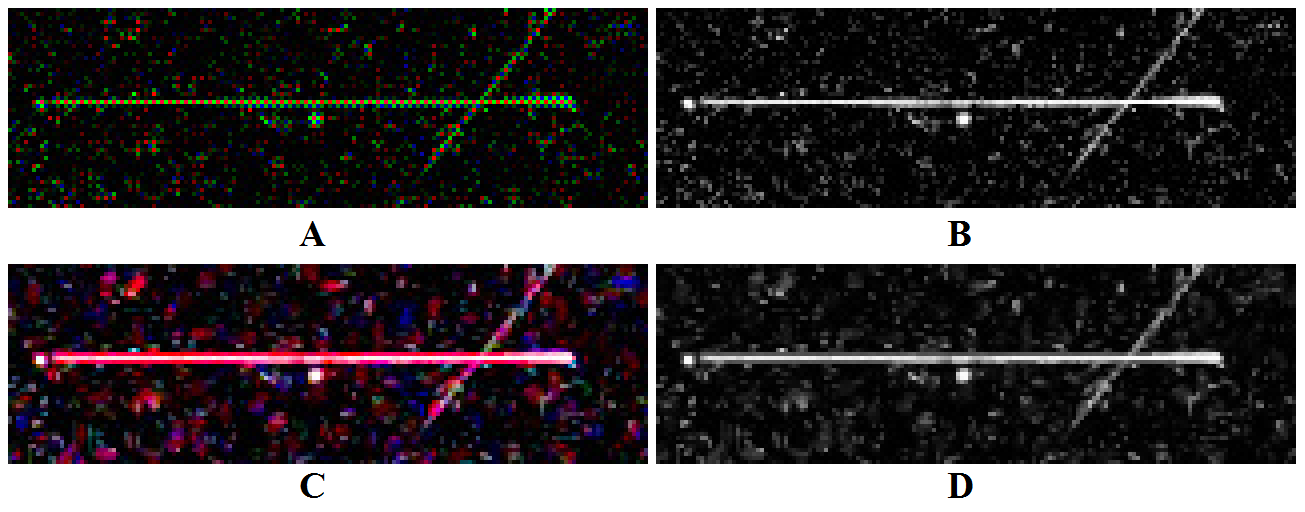
A: Raw values on sensor pattern, B: Raw values converterted to grayscale, C: Demosaiced Image, D: Demosaiced image converted to grayscale
Its clear from this example that the demosaiced images are blurier than the raw image because the value of a pixel is dependent on not only its own intensity but on the intensity of its neighbors. The effect is even more clear when pixels of the same color are lit up while their neighbots are dark. The demosaicing algorithm fills everything in with the same color since it assumes that there was light on the adjacent pixels that wasn't picked up because it was the wrong color.
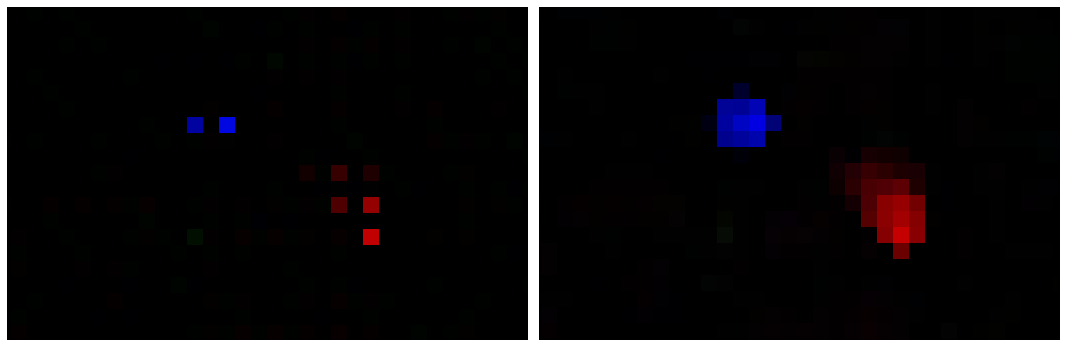
Left: Raw values on sensor pattern, Right: Demosaiced Image
Beyond this unusual application, as someone who still shoots black and white film, I think its a shame that you can't buy a cheap DSLR with no Bayer filter on its sensor. I have looked into removing the bayer layer myself, but its a complex and easy to screw up process unfortunatly. A camera without a bayer filter would takes pictures with characteristics similar to black and white film that you can't quite replicate by converting a color photo to monochrome.
Result
I was able to save captures for a variety of fluences and shielding arrangements. I opted for longer exposures to increase the number of events per frame, but some of the shots are arguably a bit cluttered as a result. The camera, being a complex digital device itself, experienced a number of single event upsets (SEU) that required a power cycle to clear. All of these happened with the camera behind lead shielding, so they were induced by secondary particles like fast neutrons. This shows again that you can't assume that shielding test equipment with heavy metal shields will protect against SEUs. The typical failure signature was that the camera would no longer take new pictures, but it would still show up on USB and allow its SD card to be accessed. In later runs to higher total fluences, the camera disappeared from USB entirely. All of these SEUs was cleared by a power cycle except for one that required the battery to be removed.
It is normal to see SEUs in consumer hardware like this — especially hardware without ECC RAM. My Siglent oscilloscope craps out due to (presumably) bit flips induced by fast neutrons any time it is in the room with the beam even when it is far to the side of the beam line and surrounded by a cave of borax. Some people in the radiation effects community like to use borax and borated polyethylene to shield test equipment, but I think in most cases this does little to stop the fast neutrons that actually cause most bit flips.
As materials in the room became activated (including the lead shielding blocks), the camera started to pick up more events while the beam was off. The camera also picked up its own activity since random pixels were lit up even with the camera moved far from other materials that had been in the beam. I'm now curious what if a DSLR can pick up gammas from a 1uCi Co-60 check source. The camera was activated (became radioactive) by this testing, but such activity is mostly due to short lived isotopes. The camera went into the 'hot case' with the rest of our test articles and was shipped back a few weeks later after it decayed back to background levels.
Data
The RAW files directly from the camera as well as JPEG files created after removing the Bayer mask can be found here. The file names are pretty self explanatory. "1e7_Pb5cm_135" indicates the shot was taken with a fluence (flux multiplied by exposure time) of 1e7 protons per square cm (flux and fluence is almost always normalized to the area of the beam) with 5 cm of lead for shielding. All shots are at ISO100 and at normal incidence (there are a two shots at 90 degree incidence) unless otherwise indicated.
Interesting Frames
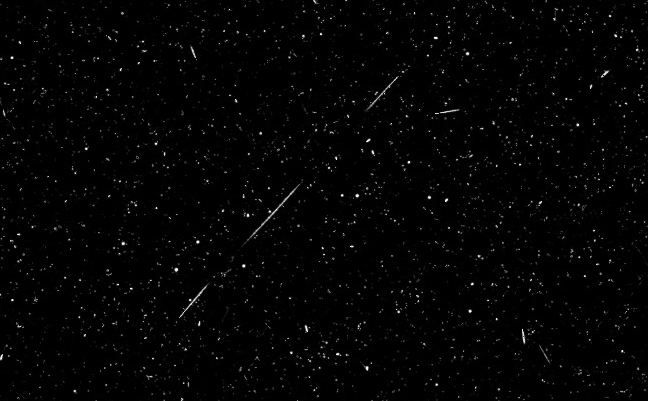
Particle Skipping in and out of the Plane of the Sensor
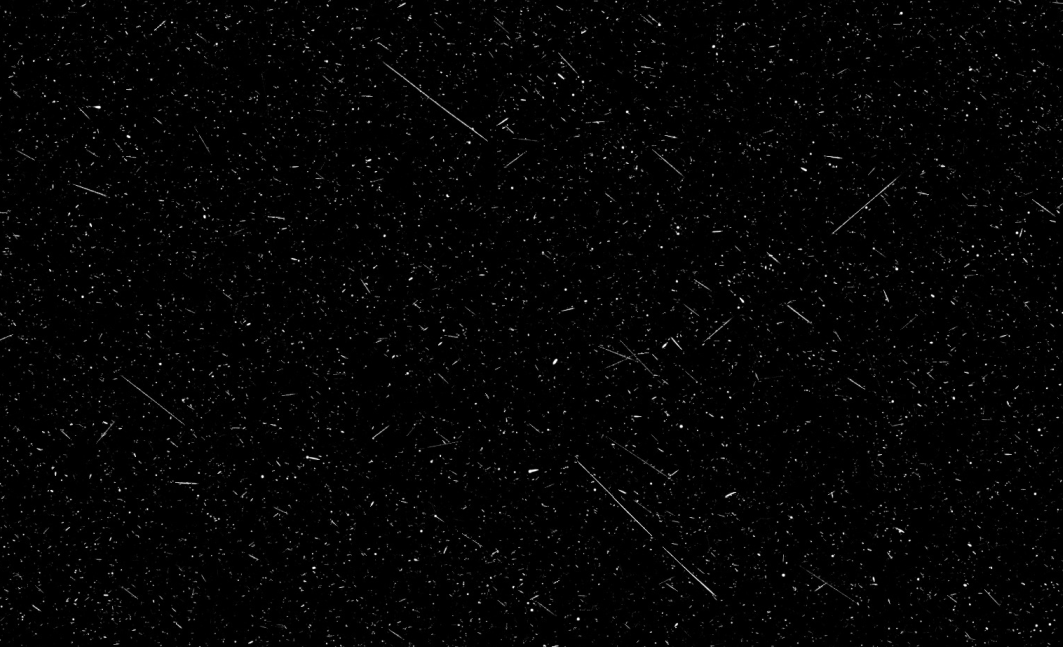
Larger Number of In-Plane Events with the Sensor 90 Degrees Relative to Beam
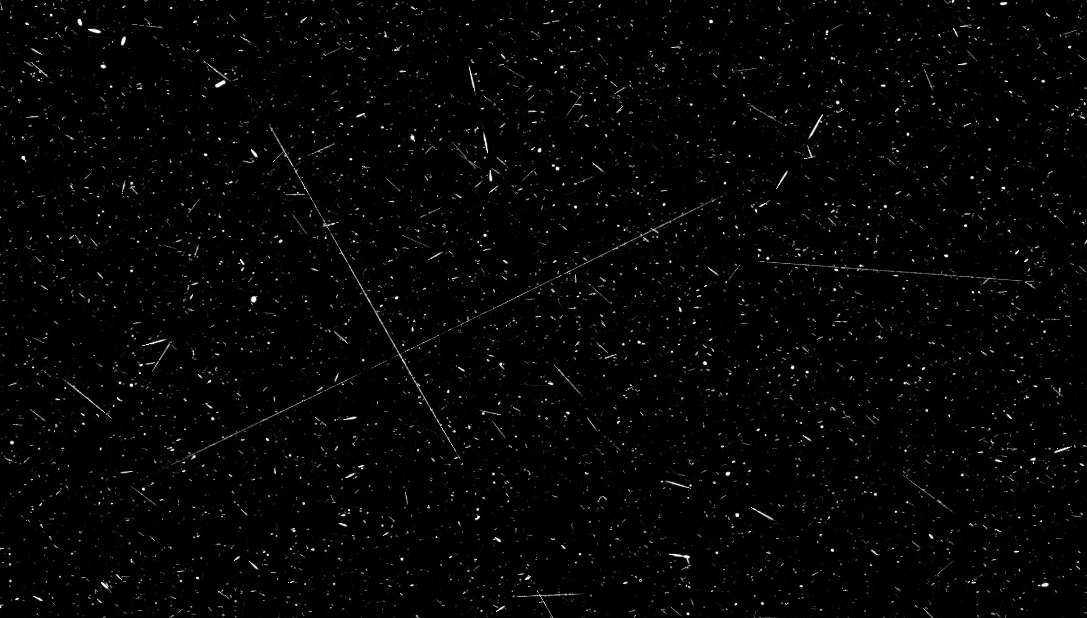
More Events at 90 Degrees
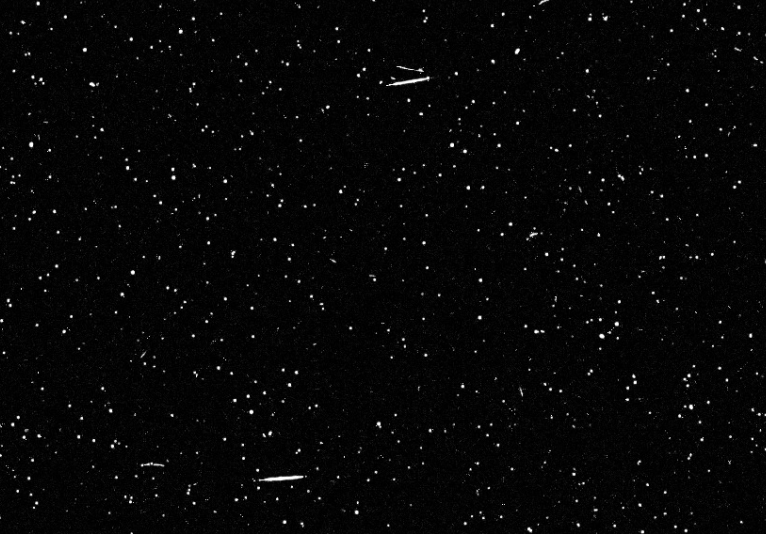
Shot at ISO6400